

Setup
Turn the booking engine on, choose the rooms and rates you sell, check what the site inherits from the property, then save a draft and publish.
Turning the booking engine on gives your property a hosted storefront and a subdomain of its own, seeded from data the PMS already holds. From there the work is choosing what you sell, checking the copy, and pressing Publish site. Nothing reaches a guest until you do.
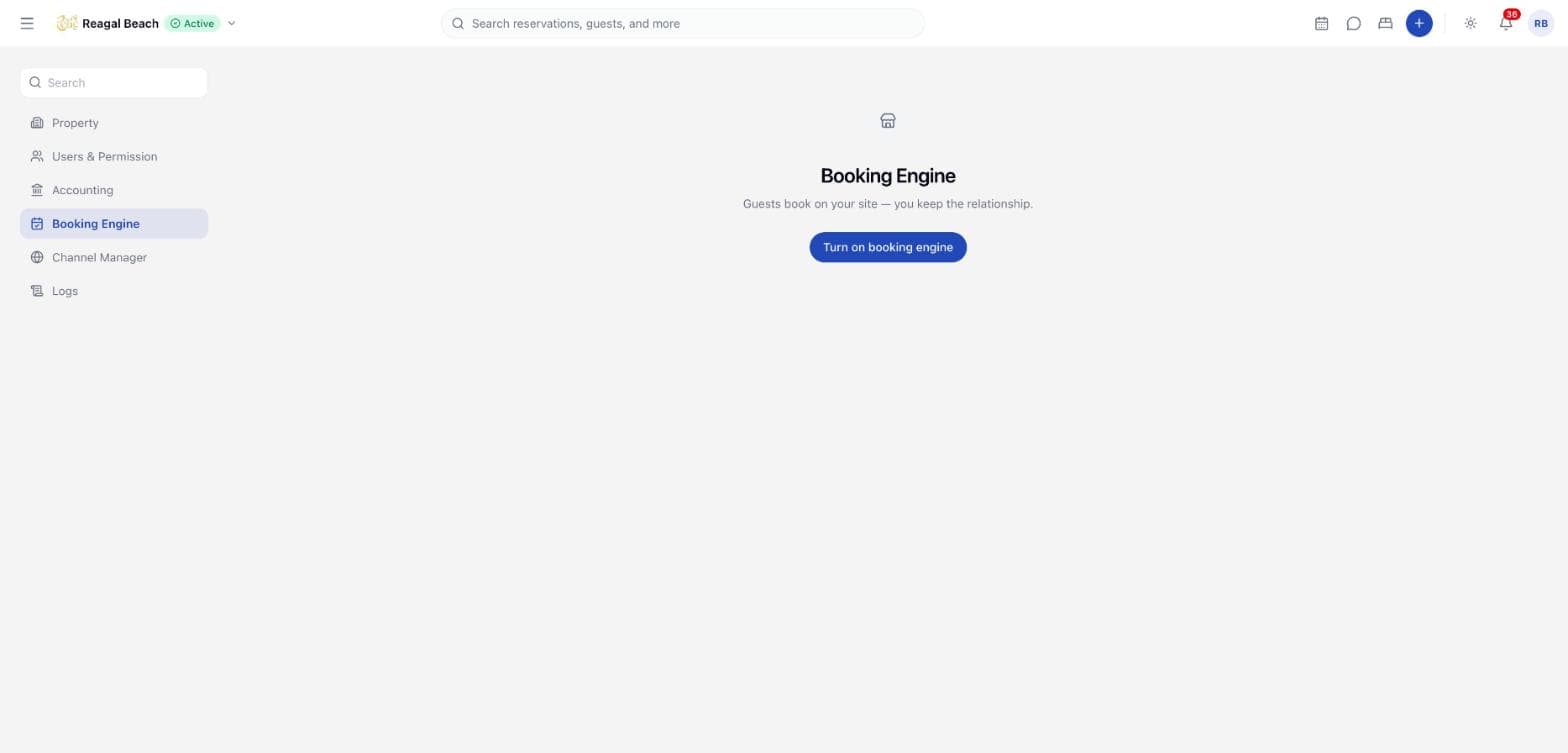
Open Settings in the sidebar and choose Booking Engine. You need the booking engine permission — read to look, write to save, publish, or change domains. See Users and permissions.
Key terms
Draft — what the builder edits. Saved to Innvera, rendered only in the preview panel.
Published config — a frozen copy of the draft, written when you press Publish site. Live domains render this and nothing else.
Showcased inventory — the room types and rate plans you have ticked under Rooms & rates. Only these can be searched, quoted and booked on the site.
Turn the engine on
Open Settings → Booking Engine
While the engine is off the screen shows a single card — "Guests book on your site — you keep the relationship." — and one button.
Click Turn on booking engine
Innvera does three things at once: it saves a first draft, seeds it from your existing data, and issues your default subdomain your-slug.book.innvera.io.
The subdomain is registered before the engine is marked as on. If that registration fails, nothing is saved and you see the error instead — so a half-enabled engine with an address that never resolves cannot happen. Try again, or ask your administrator to check the hosting configuration.
Look at what was seeded
The starter draft uses the Classic template and pulls from the property: name, description, logo, primary email and phone, address, your enabled facilities (up to twelve) as amenity highlights, and your policies as the policies text. All of it is editable — see Branding and content.
A toast confirms Booking engine turned on and the screen splits into the setup rail on the left and the Shopfront preview on the right.
The screen
The header strip carries the title, a status badge, your live URL with copy and open buttons, and the actions:
| Control | What it does |
|---|---|
| Save draft | Saves your edits. Greyed out when there is nothing unsaved. |
| Publish site | Copies the saved draft to the live site. Greyed out while you have unsaved changes. |
| ⋯ → Turn off booking engine | Stops every hostname serving guests. |
| Status badge | Meaning |
|---|---|
Draft | Never published. Nothing is being served. |
Live | The published site matches your saved draft. |
Changes pending | You have saved (or unsaved) edits that are not on the live site yet. |
The setup rail has five sections — Mode & template, Rooms & rates, Theme, Content, Domains. An amber dot next to a section means it still blocks publishing: no template chosen, or no rooms and rates selected.
Mode and template
Mode offers two cards. White Label — the hosted storefront — is the one you use.
Booking Engine API — coming soon
The second card, Booking Engine API ("Use the same booking APIs in your own site or app"), is marked Coming soon and cannot be selected.
Template lists the layouts in the catalogue:
| Template | Suits |
|---|---|
| Classic | A clean, single-column storefront: hero, about, amenities, gallery, policies, FAQs, contact. |
| Atelier | An editorial layout for considered hotel storytelling. |
| Courtyard | A warm, welcoming layout for independent properties. |
| Horizon | A spacious layout focused on imagery and discovery. |
Choosing a template while your theme and content are still empty seeds both with that template's defaults. Choosing one later keeps everything you have already written — only the arrangement changes.
Rooms and rates
Open Rooms & rates: "Pick rooms to sell, then which rates appear under each."
Ticking a room type selects every rate plan underneath it at once; untick it and all of its rates go with it. Under each room type, Rates lists its rate plans — untick any you do not want sold direct, such as a corporate or OTA-only rate. Unticking the last remaining rate also removes the room type, because a room with no sellable rate cannot be booked.
Room types with no rate plan show "No rate plans for this room type"; an empty property shows "No room types yet. Add rooms first, then choose what to showcase." Create them under Room types and rooms and Rate plans first.
Prices, availability and restrictions are never entered here. Every price the guest sees is computed on the server from the same inventory, rates and restrictions the front desk and the channel manager use.
What the site inherits (and where to change it)
Several things guests see are not booking-engine fields at all. They come from elsewhere in the PMS and apply everywhere:
| On the site | Where you set it |
|---|---|
| Currency of every price | Settings → Property → General — the property currency. Rate plans are bound to it. |
| Check-in and check-out times | Policies → Check-in & Cancellation |
| Cancellation terms, and what a guest cancellation costs | Policies → Check-in & Cancellation → Cancellation Policies — the tiers drive the storefront directly. See Policies. |
| Room names, descriptions and photos | Rooms — the room type record |
| Amenity highlights (before you edit them) | Facilities |
| Contact email, phone, address | Settings → Property → Contact Information and Address, copied into the Content → Contact slots on enable |
Payment and deposits — coming soon
The storefront is pay at property throughout. No card is taken, no deposit is collected, and the checkout tells the guest so: "Nothing is charged now. You'll settle the full amount when you check in." Online prepayment is a later phase. A deposit rule set under Policies → Deposit is not collected by the booking engine; it is shown to the guest as policy text only.
Terms and conditions
There is no separate terms-and-conditions field. The checkout always shows a required tick box — "I've read and accept the booking conditions and cancellation policy" — that refers to your published policies. Put anything a guest must agree to in the Policies content slot or the FAQs.
Preview, save and publish
The Shopfront panel on the right renders your draft with desktop and mobile toggles and a refresh button. It is the draft, not the live site: pages carry a "Preview — this is an unpublished draft" banner, are hidden from search engines, and cannot take a booking.
Save the draft
Click Save draft. A toast confirms Draft saved. Saving does not change what guests see.
Publish
Click Publish site. It is disabled while anything is unsaved ("Save your draft before publishing").
Innvera checks, in order: a template is chosen, at least one room type and one rate plan are selected, and every required content slot is filled — today that is the landing Headline. A failure is specific, for example Fill in "Headline" before publishing.
Confirm it is live
The badge turns Live and a toast names the hostname: "Site published — your-slug.book.innvera.io". Open the URL from the header strip and make a test booking.
Publishing also retries any domain that is still pending or errored, so a domain you fixed at the DNS end comes good without a separate action.
Turn the engine off
Choose Turn off booking engine from the ⋯ menu and confirm: "Your live booking URL will stop serving guests until you turn it back on." Your draft, published snapshot and domains are kept — every hostname simply stops resolving to your property until you enable it again.
Common mistakes
- Publishing with unsaved edits. Publish site stays disabled until you press Save draft; the site always goes live from a saved draft, never from what is on screen.
- Expecting a draft edit to reach guests. Changing a colour or a price selection only moves the badge to Changes pending. Publish again.
- Selling a rate plan you did not mean to. Ticking a room type selects all of its rate plans. Open the room and untick the ones that are OTA- or corporate-only.
- Changing the property currency after publishing. Every price and every quote uses the property currency; change it in Property Settings first, review rate plans, then republish.
Related
Overview
A hosted, branded direct-booking site for your property at your-slug.book.innvera.io or your own domain, configured and published from the PMS.
Branding and Content
Colours, fonts, logo and favicon under Theme; hero copy, about, amenities, gallery, policies, FAQs and contact under Content — and where each lands.